Laminate Brows At Home: The Ultimate Guide To Achieving Flawless Brows
Do you dream of having perfectly shaped, sleek, and polished eyebrows without spending a fortune on professional treatments? Laminate brows at home have become a game-changer for beauty enthusiasts who want to achieve salon-quality results in the comfort of their own homes. This trend has taken the beauty world by storm, offering a cost-effective and convenient way to enhance your natural brows.
Laminate brows, also known as brow lamination, involves using a special solution to reshape and tame unruly brow hairs, giving them a lifted and polished appearance. With the right tools and techniques, you can achieve the same stunning results at home, saving both time and money.
In this comprehensive guide, we’ll explore everything you need to know about laminating your eyebrows at home. From understanding the process and required tools to step-by-step instructions and expert tips, this article will equip you with all the knowledge you need to master the art of DIY laminate brows.
- What Do You Call Your Partner When Engaged
- Boobs In Space
- Daily Spf For Oily Skin
- Blonde And Red
- Woman Spring Jacket
Table of Contents
- What Are Laminate Brows?
- Benefits of Laminate Brows
- Tools and Products Needed for Laminate Brows at Home
- Preparation Tips for Laminate Brows at Home
- Step-by-Step Guide to Laminate Brows at Home
- Common Mistakes to Avoid
- How Long Does Laminate Brows Last?
- Safety Tips for Laminate Brows at Home
- Alternatives to Laminate Brows
- Frequently Asked Questions
What Are Laminate Brows?
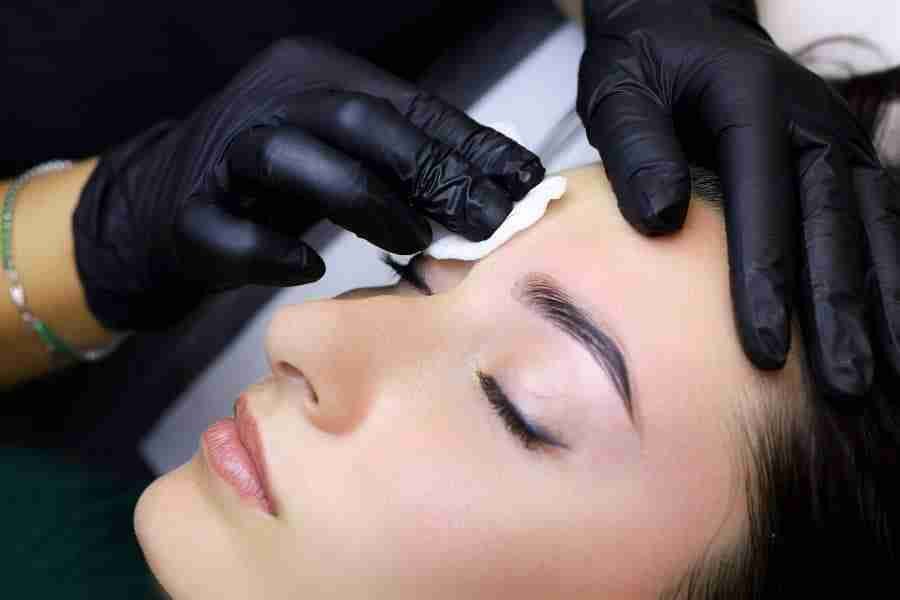
Laminate brows refer to a non-invasive beauty treatment that straightens and lifts the brow hairs, creating a fuller and more polished appearance. The process involves applying a special keratin-based solution to the eyebrows, which breaks down the natural bonds in the hair, allowing them to be reshaped. A neutralizing solution is then applied to set the new shape, resulting in sleek, lifted brows that frame the face beautifully.
Unlike microblading or other permanent makeup procedures, laminate brows are temporary and typically last between four to six weeks. This makes it an ideal option for those who want to enhance their brows without committing to a permanent solution.
Variations of Laminate Brows
While laminate brows are primarily known for their lifting and straightening effects, there are variations of the treatment that cater to different brow concerns. Some variations include:
- Shorter In The Back Longer In The Front Hairstyles
- Kinky Home Videos
- Special First Birthday Gift
- Petite With Big Breasts
- Jake From The Ultimatum
- Lash Lamination: A similar process applied to the eyelashes for longer and fuller lashes.
- Brow Tinting: Combining laminate brows with tinting to enhance color and definition.
- Volumizing Lamination: A technique that adds volume to sparse brows.
Benefits of Laminate Brows
Laminate brows offer numerous benefits, making them an attractive option for both beginners and beauty enthusiasts. Below are some of the key advantages:
- Cost-Effective: DIY laminate brows at home can save you money compared to professional treatments.
- Time-Saving: Once your brows are laminated, you’ll spend less time on daily grooming.
- Enhanced Appearance: Laminated brows provide a polished, lifted look that enhances facial features.
- No Pain: Unlike waxing or threading, laminate brows are pain-free and gentle on the skin.
- Customizable Results: You can tailor the shape and style to suit your preferences.
Why Choose Laminate Brows Over Other Treatments?
Compared to other brow treatments like microblading or brow extensions, laminate brows offer a safer and more temporary solution. They are perfect for those who want to experiment with their look without committing to permanent changes. Additionally, laminate brows are suitable for all skin types and are less invasive than other cosmetic procedures.
Tools and Products Needed for Laminate Brows at Home
Before you begin the laminate brows process at home, it’s essential to gather the necessary tools and products. Here’s a list of what you’ll need:
- Laminate Brow Kit: A professional-grade kit that includes the laminating solution, neutralizer, and applicators.
- Cleansing Wipes: To clean the brow area before application.
- Tweezers: For shaping and tidying up the brows.
- Brow Brush: To comb through the hairs during the process.
- Protective Cream: To shield the skin around the brows from the solution.
- Brow Gel: To set the brows after the treatment.
Where to Buy Laminate Brow Kits
You can purchase high-quality laminate brow kits from reputable beauty suppliers or online retailers such as Amazon or Sephora. Always ensure that the products you buy are safe and approved for home use.
Preparation Tips for Laminate Brows at Home
Proper preparation is key to achieving successful results when laminating your brows at home. Follow these tips to ensure a smooth and effective process:
1. Cleanse the brow area thoroughly to remove any makeup or oils that could interfere with the treatment.
2. Use tweezers to shape your brows and remove any stray hairs before starting the lamination process.
3. Apply a protective cream around the brow area to prevent the solution from irritating the skin.
4. Set up a clean and well-lit workspace to ensure precision during the treatment.
How to Choose the Right Kit for Your Needs
When selecting a laminate brow kit, consider factors such as the quality of the ingredients, the ease of use, and any specific needs you may have, such as sensitivity to certain chemicals. Reading reviews and comparing products can help you make an informed decision.
Step-by-Step Guide to Laminate Brows at Home
Now that you have all the necessary tools and preparation done, it’s time to dive into the step-by-step process of laminating your brows at home:
- Start by cleansing the brow area with a gentle cleanser or wipe.
- Apply a protective cream around the edges of the brows to safeguard the skin.
- Using the applicator provided in the kit, apply the laminating solution evenly to the brows, working from the inner corner outward.
- Comb through the hairs with a brow brush to ensure the solution is distributed evenly.
- Let the solution sit for the recommended time, usually around 10-15 minutes.
- Rinse off the laminating solution with lukewarm water and pat the area dry.
- Apply the neutralizing solution to set the new shape, leaving it on for the specified duration.
- Rinse off the neutralizer and finish by applying a clear or tinted brow gel to lock in the results.
Expert Tips for Best Results
To achieve the best possible results, consider the following expert tips:
- Practice on a small section of hair before applying the solution to your entire brow.
- Be gentle when applying the solutions to avoid irritation or damage to the skin.
- Follow the instructions provided in the kit carefully to ensure safety and effectiveness.
Common Mistakes to Avoid
While laminating your brows at home can be straightforward, there are common mistakes that could compromise your results. Here are a few to watch out for:
- Over-Processing: Leaving the solutions on for too long can damage the hair and irritate the skin.
- Improper Application: Uneven application can lead to inconsistent results.
- Skipping Preparation Steps: Neglecting to clean or protect the skin can affect the outcome.
How to Fix Mistakes
If you encounter any issues during the process, don’t panic. You can often fix mistakes by rinsing the area with water and starting again. For more severe issues, consult a professional for advice.
How Long Does Laminate Brows Last?
The effects of laminate brows typically last between four to six weeks, depending on factors such as hair growth and skincare routines. To maintain the results, avoid using harsh skincare products or exfoliants around the brow area during the treatment period.
For optimal longevity, consider repeating the process every six weeks or as needed.
Factors Affecting Longevity
Several factors can influence how long your laminate brows last, including:
- Your natural hair growth cycle.
- The quality of the products used.
- Your daily skincare and grooming habits.
Safety Tips for Laminate Brows at Home
Safety should always be a top priority when performing beauty treatments at home. Here are some safety tips to keep in mind:
- Perform a patch test before using the solutions to check for any allergic reactions.
- Wear gloves during the process to protect your hands from the chemicals.
- Work in a well-ventilated area to avoid inhaling any fumes.
- Follow the instructions provided in the kit carefully to ensure safe application.
What to Do if You Experience Irritation
If you experience any irritation or discomfort during the process, rinse the area immediately with water and discontinue use. Consult a dermatologist if the irritation persists.
Alternatives to Laminate Brows
While laminate brows are a popular choice, there are other options available for enhancing your brows. Some alternatives include:
- Brow Extensions: Adding individual hair extensions to create fuller brows.
- Microblading: A semi-permanent makeup technique that involves tattooing hair-like strokes onto the skin.
- Brow Tinting: Enhancing the color and definition of your natural brows with dye.
Choosing the Right Option for You
When deciding between laminate brows and other treatments, consider factors such as your budget, desired results, and the level of commitment you’re willing to make. Consult with a beauty professional if you’re unsure which option is best for you.
Frequently Asked Questions
Can Anyone Do Laminate Brows at Home?
Yes, anyone can attempt laminate brows at home with the right tools and preparation. However, it’s important to follow safety guidelines and use high-quality products to ensure the best results.
Is Laminate Brows Safe for Sensitive Skin?
Yes, laminate brows are generally safe for sensitive skin, provided you use a gentle formula and perform a patch test beforehand. If you have severe sensitivities, consult a dermatologist before proceeding.
Can You Combine Laminate Brows with Other Treatments?
Yes, many people choose to combine laminate brows with tinting or other treatments for enhanced results. Just ensure that the products you use are compatible and safe for use together.
Kesimpulan
Laminate brows at home offer a convenient and cost-effective way to achieve stunning, polished brows without leaving the comfort of your home. By following the steps outlined in this guide and adhering to safety precautions, you can master the art of DIY laminate brows and enjoy salon-quality results.
We encourage you to share your experiences and tips in the comments below. Don’t forget to explore our other beauty guides for more inspiration and advice. Happy laminating!
- Best Setting Sprays
- Strawberry Blonde Hair Medium Length
- Vivaia Discount
- When Is Greys Back
- How To Make It Look Like You Have Bangs

Introducing the BROW LAMINATE ⠀⠀⠀⠀⠀⠀⠀⠀⠀ your brows are perfect from

How to laminate brows Just for a few minutes at home
Perfectly Styled Brows The Laminate Brow Advantage
