Forest Creative Nails: A Trend That Inspires Nature-Lovers
Forest creative nails have become a sensation in the beauty world, offering a unique way to bring the tranquility of nature to your fingertips. This innovative nail art trend allows enthusiasts to express their love for the outdoors through intricate designs that mimic forests, trees, and natural landscapes. Whether you're a nail art enthusiast or simply curious about the latest beauty trends, this article will provide you with all the information you need to explore this captivating style.
As people increasingly seek ways to incorporate nature into their daily lives, forest creative nails have emerged as a perfect blend of art and eco-inspired aesthetics. This trend appeals to those who admire the beauty of forests and want to carry that essence with them wherever they go. From lush greenery to serene woodland scenes, these designs are both elegant and refreshing.
In this article, we will delve into the world of forest creative nails, exploring their origins, design techniques, and tips for achieving stunning results. Whether you're a professional nail artist or a DIY enthusiast, you'll find valuable insights to enhance your skills and creativity. Let's dive in!
- Enormous Pregnant Belly
- What Is The Door Test
- Does One Skin Really Work
- Porn Lesbian Story
- Recommended Morphe Brushes
Table of Contents
- The Origin of Forest Creative Nails
- Design Techniques for Forest Creative Nails
- Essential Tools and Materials
- Popular Forest Creative Nail Designs
- Step-by-Step Guide to Creating Forest Nails
- Tips for Perfecting Your Forest Nail Art
- Maintaining Your Forest Creative Nails
- Benefits of Forest Creative Nails
- Cost Considerations
- The Future of Forest Creative Nails
The Origin of Forest Creative Nails
Forest creative nails have their roots in the growing global trend of eco-friendly and nature-inspired beauty. The concept gained popularity as more people sought to incorporate natural elements into their personal style. This trend began in Asia, where intricate nail art designs have long been celebrated, and quickly spread to other parts of the world.
The idea behind forest creative nails is to replicate the beauty of nature on the nails, using colors, textures, and patterns that evoke the feeling of being surrounded by trees, leaves, and other natural elements. This art form has captivated the imagination of nail enthusiasts worldwide, making it one of the most sought-after styles in recent years.
Historical Evolution
From simple leaf patterns to complex woodland scenes, forest creative nails have evolved significantly over time. Initially, these designs were limited to basic green tones and leaf shapes, but advancements in nail art techniques and materials have allowed artists to create more intricate and realistic designs.
- Old Money Haircut
- Is Coach Having A Black Friday Sale
- Love Is Blind Meme
- Best Setting Sprays
- Blonde And Red
Design Techniques for Forest Creative Nails
To achieve stunning forest creative nails, nail artists employ a variety of techniques that bring depth and dimension to the designs. These techniques include:
- Stippling: Using a stippling brush to create textured effects resembling tree bark or moss.
- Airbrushing: Applying paint with an airbrush to achieve soft gradients and realistic foliage.
- Freehand Painting: Creating detailed designs by hand, allowing for personalized and unique results.
- Stamping: Using nail art stamps to replicate intricate patterns and textures quickly and efficiently.
Choosing the Right Technique
Selecting the appropriate technique depends on your skill level and the desired outcome. Beginners may find stamping and stenciling easier to master, while experienced artists can experiment with airbrushing and freehand painting to create more elaborate designs.
Essential Tools and Materials
To create forest creative nails, you'll need a few essential tools and materials. These include:
- Nail polish in various shades of green, brown, and earthy tones.
- Detail brushes for precise painting.
- Stencils or stamps for replicating patterns.
- Topcoat for a glossy finish and protection.
Investing in high-quality materials ensures better results and longer-lasting designs. For instance, using premium nail polish can prevent chipping and fading, allowing your forest creative nails to stay vibrant for weeks.
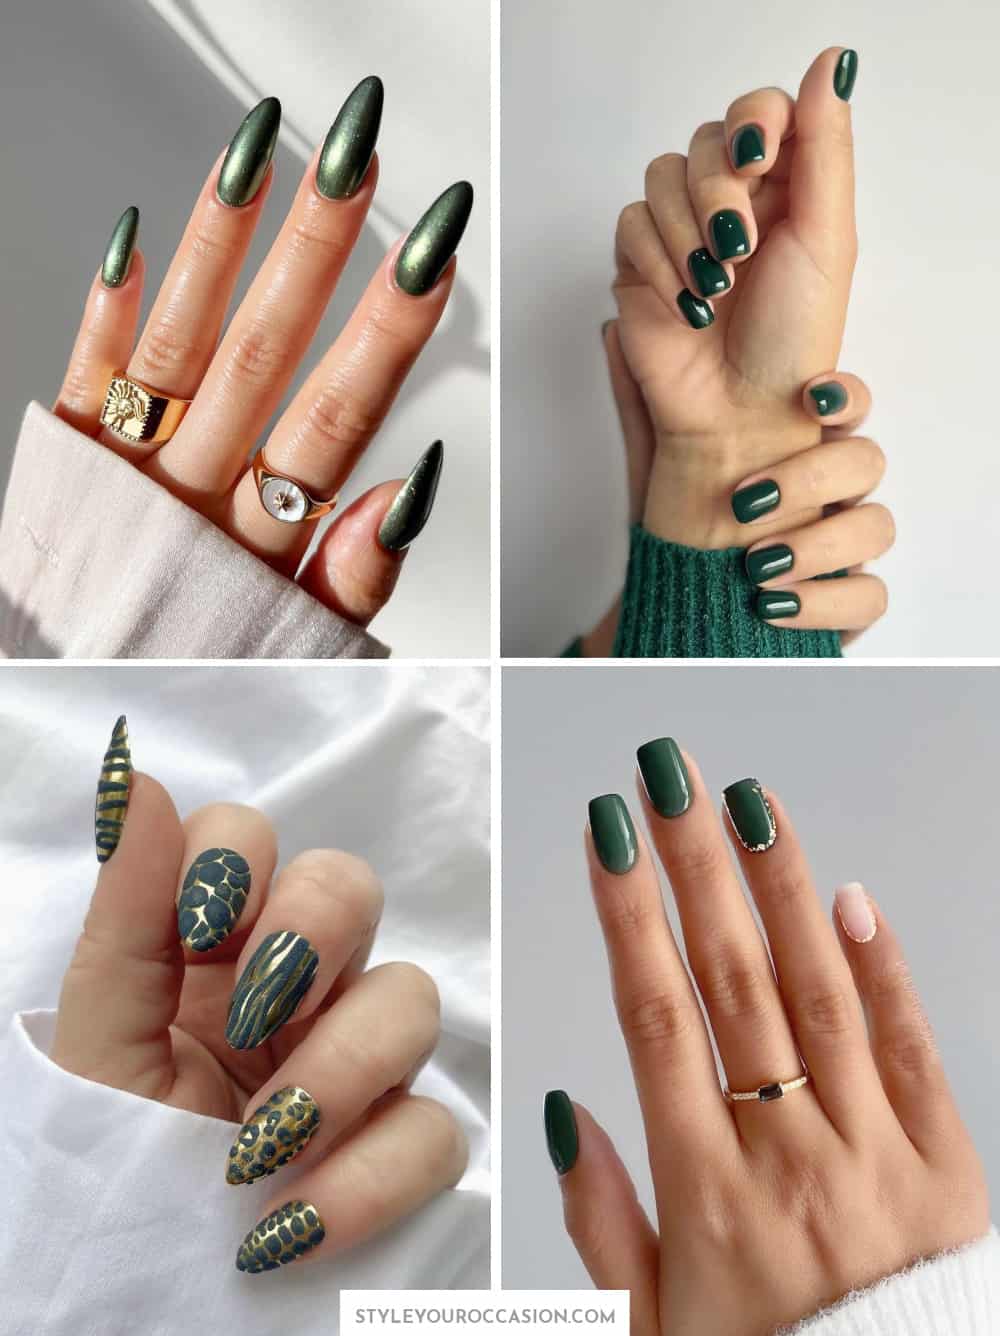
Popular Forest Creative Nail Designs
There are countless forest creative nail designs to choose from, each offering a unique take on the theme. Some of the most popular designs include:
- Tree Silhouettes: Minimalist designs featuring silhouettes of trees against a gradient sky.
- Leaf Patterns: Intricate leaf designs in various shades of green and brown.
- Woodland Scenes: Full nail art designs depicting entire forest landscapes.
- Mossy Textures: Designs that mimic the look of moss-covered tree trunks.
Customizing Your Design
Personalizing your forest creative nails is easy with a few tweaks. Consider incorporating your favorite colors or adding elements like flowers or animals to make the design more unique. The possibilities are endless, allowing you to create a look that truly reflects your personality.
Step-by-Step Guide to Creating Forest Nails
Creating forest creative nails at home is a rewarding experience. Follow these steps to achieve professional-looking results:
- Prepare your nails by cleaning and shaping them.
- Apply a base coat to protect your nails and enhance polish adherence.
- Paint the background color, such as a gradient sky or earthy tones.
- Use detail brushes to paint tree silhouettes or leaf patterns.
- Add finishing touches like stenciled textures or stamped designs.
- Seal your design with a high-quality topcoat for durability.
Common Mistakes to Avoid
When creating forest creative nails, it's important to avoid common mistakes such as applying too much polish or rushing the drying process. Taking your time and using the right tools can help you achieve flawless results.
Tips for Perfecting Your Forest Nail Art
Here are some expert tips to elevate your forest creative nail art:
- Practice regularly to improve your skills and confidence.
- Experiment with different techniques to find what works best for you.
- Use reference images to inspire your designs and ensure accuracy.
- Invest in quality tools and materials for better performance and longevity.
Enhancing Your Skills
Continuous learning is key to mastering forest creative nails. Consider taking online courses or attending workshops to refine your techniques and stay updated on the latest trends.
Maintaining Your Forest Creative Nails
Proper maintenance is essential to keep your forest creative nails looking fresh and vibrant. Here are some tips for maintaining your design:
- Apply a topcoat every few days to prevent chipping.
- Avoid using harsh chemicals that can damage your nails or polish.
- Regularly clean your nails to remove dirt and oil buildup.
Repairing Damaged Designs
If your forest creative nails become damaged, you can repair them by touching up the affected areas with detail brushes and polish. For more severe damage, consider redoing the entire design to maintain its integrity.
Benefits of Forest Creative Nails
Forest creative nails offer numerous benefits beyond their aesthetic appeal. These include:
- Expressing creativity and personal style.
- Enhancing self-confidence through unique and eye-catching designs.
- Connecting with nature and promoting mindfulness.
By incorporating forest creative nails into your beauty routine, you can enjoy the therapeutic benefits of creating art while showcasing your love for the environment.
Cost Considerations
The cost of forest creative nails varies depending on factors such as the complexity of the design, the quality of materials used, and the artist's expertise. On average, professional designs can range from $30 to $100, while DIY options are generally more affordable.
DIY vs. Professional
While DIY forest creative nails can save money, professional services offer the advantage of expert craftsmanship and high-quality results. Consider your budget and skill level when deciding which option is right for you.
The Future of Forest Creative Nails
As the demand for eco-friendly and nature-inspired beauty continues to grow, forest creative nails are likely to remain a popular trend. Innovations in nail art technology and materials will further enhance the possibilities for this art form, allowing artists to create even more stunning and realistic designs.
Trends to Watch
Upcoming trends in forest creative nails may include the use of 3D elements, biodegradable materials, and augmented reality experiences. These advancements will push the boundaries of nail art and provide new ways for enthusiasts to express their creativity.
Conclusion
Forest creative nails offer a beautiful and meaningful way to express your love for nature through art. By understanding the techniques, tools, and tips outlined in this article, you can create stunning designs that reflect your personal style and creativity. Whether you're a professional artist or a DIY enthusiast, this trend provides endless opportunities for exploration and innovation.
We invite you to share your thoughts and experiences in the comments below. If you enjoyed this article, consider sharing it with your friends and exploring other content on our site. Let's continue to celebrate the beauty of nature and art together!
- Bella Thorne Cuban
- Enormous Pregnant Belly
- Plantar Fasciitis Pickleball Shoes
- Ruhama Wolle
- Petite With Big Breasts

Acrylic Nails Nails in Dubai Builder Gel Gel x (nailsbychyl) on
27+ Stunning Forest Green Nails To Obsess Over in 2023

Premium AI Image Forest Moss Nails Design Earthy Green Tones
